
How To - Navien Kit

How to Install the Pro-Line Navien Kit
Video Coming Soon!

Quick Instructions:
- Before assembling, verify that the pressure tank is pressurized to between 8 and 10 psi.
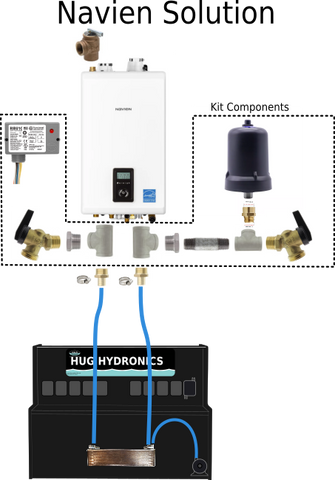
- Starting at the boiler, install the 1”, T’s onto the threaded central heating supply and return ports. Be sure to use teflon tape on ALL fittings.
- Install a 1”x1/2” bushing and boiler valve on the left hand side (output/hot side).
- Install the other 1”x1/2” Bushing, ½”x3” nipple, ½” T, pressure tank adapter, pressure tank with gasket and boiler valve in the order listed, on the right (input/cold) side.
- Once all the fittings are installed and the HUG system is connected, fill and purge the boiler following the instructions in the boiler manual, you can use the pressure relief valve to let air out of the top of the boiler, pressurize to 15-17 psi, add fluid as needed and check for leaks.