
How To - Install the Combi Boiler Adaptor

How to Install the State Combi Boiler Kit

Written instruction for how to Install the State Proline XE Combi Boiler Adaptor
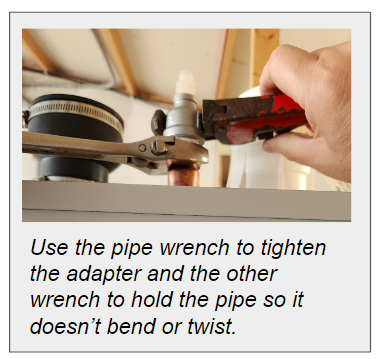
(2 wrenches needed, about 5 minutes)

- In place of the over-pressure valve, use the wrenches and plumbing tape/compound to put on the 3/4 “ to ¼” stainless steel adapter with nylon fitting.
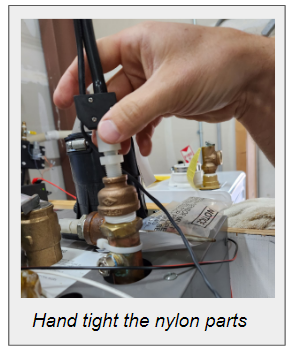
- Insert the probe and hand tighten.

-
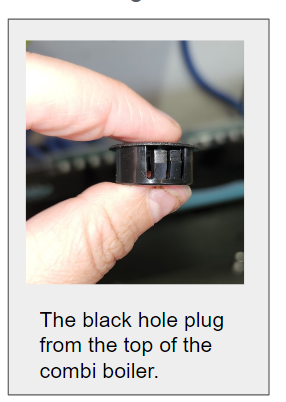
Remove the black hole plug from the top of the Combi Boiler by pinching it from underneath until it pops out.

- Slide the power connector through this hole.

- Remove the low water cut off (LWCO jumper plug) from the combi control board.
- Replace it with our Power Connector .

-
If your combi boiler has a pressure sensor: Unplug the wires from the pressure sensor and plug the jumper wire to connect them.

- On the HUG Tank, loosen the thumb screws on the right back side of the control board. Wiggle the screw slots on the Control Box under there.

-
On the HUG tank, remove a plug from an empty hose hole and replace with the adaptor’s water hose.

-
Route the Purge Connector through a hole right under the control board, and plug it into the “purge” pins at the top of the pump section that is feeding the combi boiler (usually pump #10).

-
Fasten the adaptor cable to the wall using wall clamps.
-
When you turn on the combi boiler, the LED on the Control Box should glow green (if there is water). It glows red when it senses the need for water and it is purging.


Initial fill of boiler:
Once the Combi Boiler Adaptor is installed,
Make sure the HUG Hydronics tank is full of water (or antifreeze).
Make sure power is on for the tank and pumps
Turn on the power to the boiler.
The light on the Combi Boiler Adaptor will be red, indicating that water is low.
Pump 10 should come on and the boiler should start filling with water.
You should hear air bubbles coming out of the little adaptor hose
Keep adding water (or antifreeze) to the tank as needed.
If filling the tank takes longer than 30 seconds, the flow may start cycling on and off every 30 seconds or so. This is normal.
When the boiler is full, the system will automatically stop filling and the red light on the Combi Boiler Adaptor will turn green, indicating that the boiler is ready to operate.
Normal Operation:
When all is well, the Combi Boiler Adapter light will be green, indicating that water is all the way to the top of the boiler.
If enough air builds up in the boiler so that water no longer touches the probe, the light will turn orange and pump 10 will come on, adding water to the boiler and purging the air. Normally this takes less than a second.